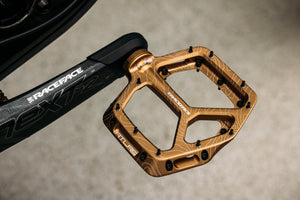
Service kits for the Atlas pedal are sold separately from the pedals separately. They include repair and replacement parts for a complete pedal rebuild.
Note: When reinstalling the threaded cap on the Atlas pedal, it’s possible to accidentally push the endcap seal out of place but this kit includes a service tool to help install it error-free when you service your pedal.
Axle Disassembly
Tools needed:
- 30mm socket wrench (chamfer-less preferred, ensure full engagement)
- 1 3/16” socket (chamfer-less preferred, ensure full engagement)
- Knipex pliers wrench, smooth jaw
- Vise or arbor press
Removing axle assembly from the body:
Step 1 – Use one of the above tools to unthread the Body Cap.
Tip: The cap for right-hand pedals is left-hand unthreaded so you have to turn it clockwise to loosen.
Step 2 – Pull axially on pedal threads to remove axle assembly from the body. If you’re unable to separate by hand, try threading the axle into a crankarm to get more purchase and then pull on the pedal body.
Removing axle sleeve and bearing from the axle. This is a light press-fit onto the axle so it may take some force to remove.
Step 3 – Place 17mm internal-diameter bearing drift over outboard side of axle assembly.
Step 4 – Mount the axle assembly with drift on a vise or in an arbor press.
Step 5 – Apply force directly downwards to the end of the axle to separate the sleeve and bearing from the axle.
Tips and tricks:
- Using a drift to load the bearing evenly helps prevent damage for reuse. You can use vise jaws directly but there’s a higher risk damage.
- Arbor press is preferred to apply consistent and even force. You can also use a soft faced hammer but may damage the bearing.
- Find a drift long enough to clear the axle and a vise with enough throw and you can use it like a press.
- Park Tool HBP-1 uses bushings sized well for this. If available, use the 17mm ID bushing or sleeve in the kit.
Step 6 – Apply grease to the bearing surface of the axle.
Step 7 – Slide the bearing all the way to the flange using your hands or a very light tap of a hammer using the drift.
Step 8 – Place axle sleeve over threads of the axle, flanged side towards the bearing.
Step 9 – Place the 15mm internal diameter bearing drift over the threaded side of axle assembly.
Reassembly
Step 10 – Mount the axle assembly with drift on a vise or in an arbor press.
Step 11 – Apply force directly downwards to the outboard end of the axle to drive the sleeve back onto the axle. Make sure the sleeve bottoms out on the bearing race.
Step 12 – Once the axle assembly is complete, re-grease the bearing bore on pedal body and slide the axle assembly into the pedal body. Make sure the slot in the bushing faces the front or back edge of the pedal, not the top or bottom. Try to get the bearing as close to bottomed in its bore as possible.
Step 13 – Thread body cap back into the body. Torque to 8 Nm.
Step 14 – Reinstall pedal onto the bike.
Step 15 – Go shred!
